
Happy spring break! Yes, even nursing students get a
small break. Unfortunately I still have homework, online tests to take, and a
paper to write but thankfully I have seven days to get those accomplished.
My first priority was to make at least one DIY project
this week. Sure my priorities may seem a little out of order, but if I tell you
it was for my favorite little would that make it sound better? Good because it
IS for my favorite little! And also for me, because let’s be honest, with or
without kids we are all a little selfish.
There is a wall in our kitchen that is boring, bare, and
in desperate need of some TLC. See? It’s practically screaming, “Make me
useful!” Who am I to tell that wall its useless?

So of course I headed to Pinterest for some
Kitchen ideas. I wasn’t in love with anything I had found (this rarely happens)
and ended up pinning ideas for Sophia’s birthday party, bathroom ideas, my
future closet, and playroom ideas. While looking at the marvelous playrooms I
noticed one had a chalkboard wall, say what?! How neat!
We rent, so painting an entire wall black was definitely
not an option.
Project:
Giant Chalkboard
Specs:
Sturdy, eye-pleasing, not permanent, and fun for our little.
Deadline:
Before I start school on March 24th.

DISCLAIMER: Rant ahead.
“You’re spoiling her rotten! She
runs your house doesn’t she? Why would you put a giant chalkboard in your
kitchen?! What a mess that makes. Your house must be a mess all the time.”
These are some of the many things I
am asked told when I tell stories of
our crazy life or tell people about my next big project.
Here’s why I want a giant chalkboard
in our kitchen, why I let her draw on my fridge with dry erase markers, play in
the sink until it almost overflows onto the floor, or blow bubbles in our
kitchen: SHE’S A KID! She is a learning, full of energy, curious, and sometimes
naughty KID. We do set boundaries, but generally when there is danger
associated with an activity, such as a safety handle on our front door so she can’t
run outside and no running in the house because there are sharp corners on some
of our furniture pieces.
So maybe she does “run this house” because this is her
home. This is her learning environment, this is where I want her to be who she
is as her two year old self, where she can make mistakes, and where she can
feel confident in all that she does.
This does not make me
a bad parent and it does not make her an unruly child. She does have rules, she
still has a bedtime, she has to eat her veggies, and she needs to use her
manners. Yes, she does misbehave, she pouts, she doesn’t sit nicely in church every Sunday, she throws fits in the grocery store because I won’t buy
her favorite fruit snacks, and she recently learned how to stick out her tongue.
She’s two.
Enough of that bologna. Let’s get to the fun stuff!
Supplies:
1 large sheet of plywood. (We
had ours cut at 3 by 5)Magnetic primer
Chalkboard paint
Moulding for the frame (I bought white to save some paint time)
Wood glue to attach moulding to the board
Small screws
Instructions:
1. Start with the magnetic primer. You need three thin coats of magnetic primer. I used a roller to make sure I had nice, thin, and even layers. I rolled the first layer on and let it dry for two hours. I then rolled on layer two and again waited for two hours while it dried. The last coat was rolled on and I waited not so patiently while it dried for two hours.

2. Next is the chalkboard paint. You will need two coats of chalkboard paint. I let the first coat dry for two hours, and the second coat dried overnight.
 |
| I recommend testing a spot near the edge. That way if for some reason it doesn't work out, it will be covered up by the moulding. |

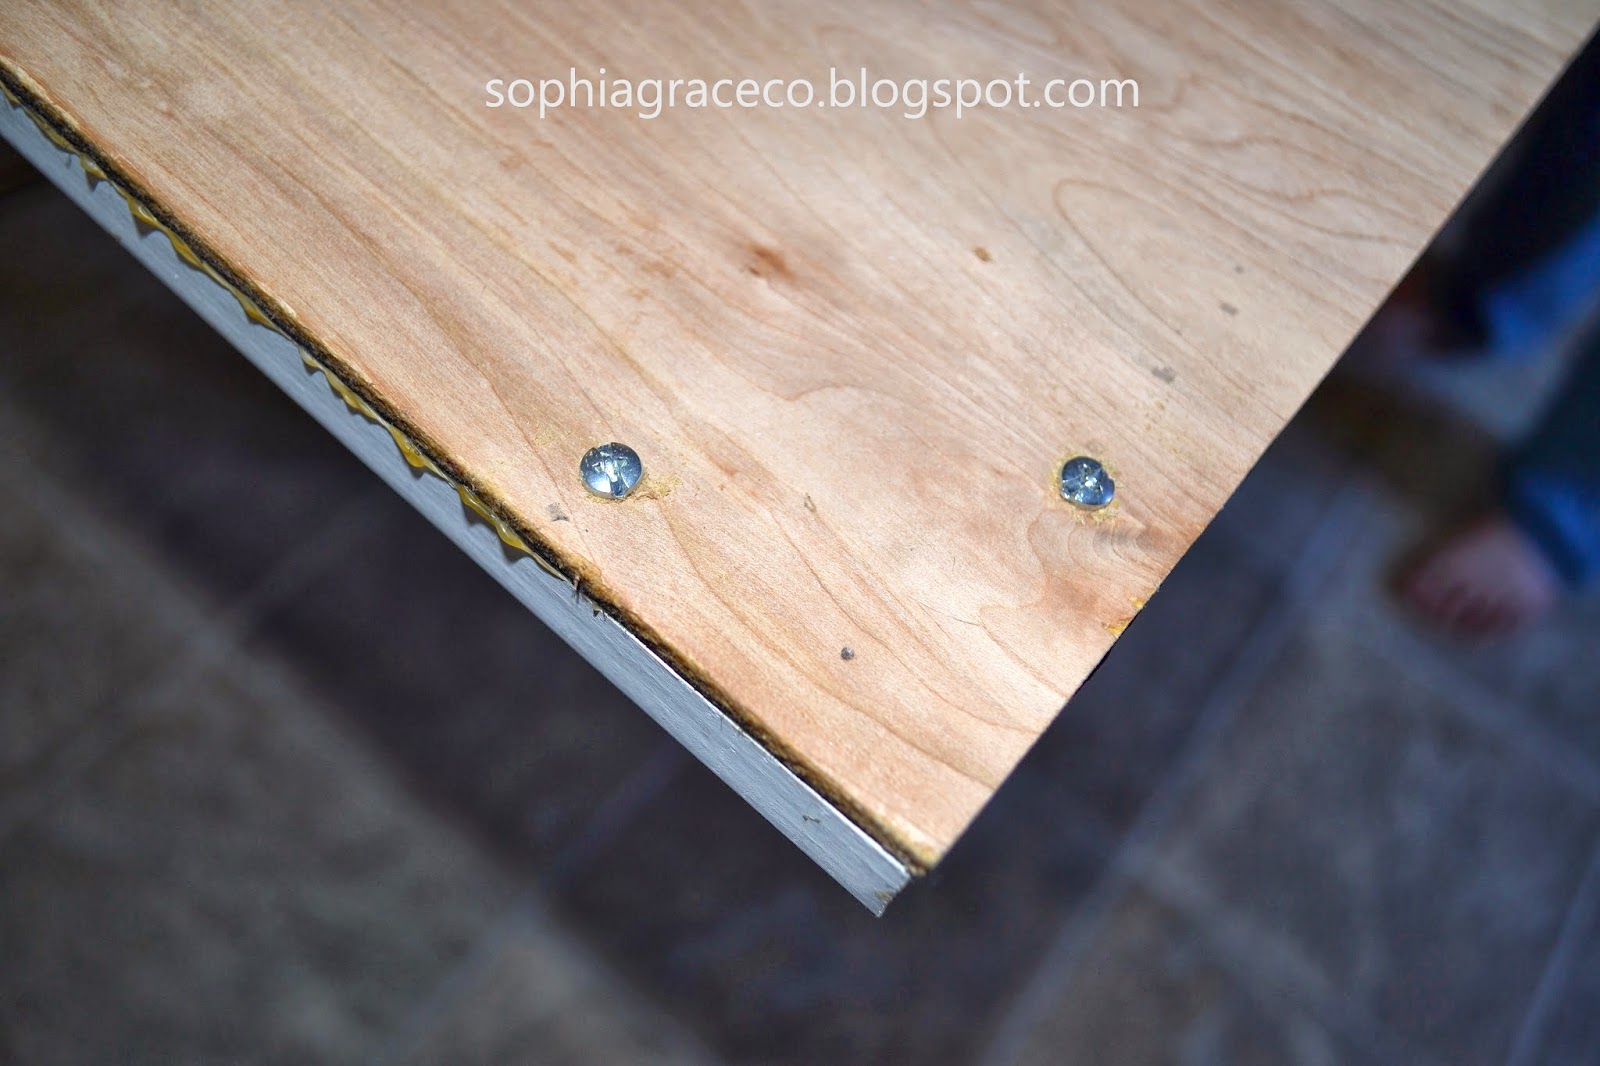
4. The next morning when everything was dry, I glued the moulding onto the painted board. Make sure you don’t use too much glue because it is a pain to clean up. You also don’t want to use too little glue, or you end up with this:

5. The glue just was not holding on the corners, so my hunk decided to use some screws to better secure the moulding. (I’m glad I keep him around.)

6. Next you need to hang it up. We used this to secure the chalkboard to the wall. It’s pretty nifty!


7. Before you let your favorite little at it, you need to prep the chalkboard. To do this you need to take a piece of chalk, turn it onto its side and rub it along the entire chalkboard. Next, take a paper towel or soft cloth and rub the chalk into the board using a circular motion. To finish the prep, take an eraser and erase any leftover chalk.


All in all, this DIY project was pretty easy. It does require a lot of time though, so I recommend you don’t start this project until you have at least a couple of free days.


